Check your dryer vent every three months for lint buildup by disconnecting the duct from the back of your dryer and visually inspecting it with a flashlight. If you notice longer drying times or your laundry room feels unusually warm, these are clear signs your vent needs attention. For comprehensive guidance on professional maintenance options, visit this site to explore expert cleaning services in your area.
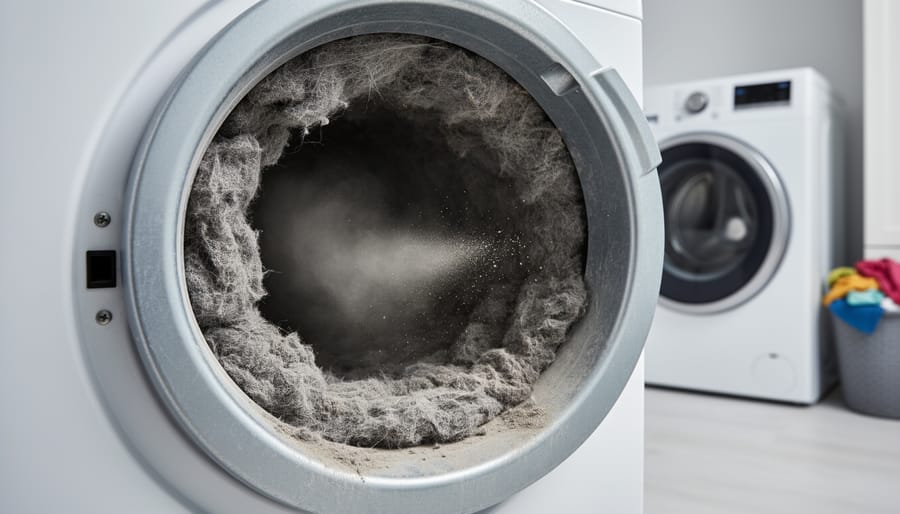
Your dryer vent silently drains your wallet and the environment. A clogged vent forces your dryer to work up to 30% harder, transforming what should be a 45-minute cycle into an energy-guzzling marathon. Most homeowners never realize that the flexible duct hidden behind their dryer accumulates pounds of lint annually, creating a thick barrier that blocks airflow and drives energy consumption skyward.
The financial impact is substantial. A poorly maintained dryer vent can add $25 to $35 monthly to your energy bills, totaling over $400 annually in wasted electricity. Beyond the immediate cost, your dryer’s lifespan decreases significantly when the motor strains against restricted airflow, leading to premature replacement expenses that could exceed $1,000.
This maintenance gap represents a perfect opportunity for environmentally-conscious homeowners to make a measurable difference. Simple vent maintenance delivers immediate results: reduced energy consumption, lower carbon footprint, faster drying times, and extended appliance life. Whether you choose the DIY route or professional service, addressing your dryer vent transforms a hidden inefficiency into quantifiable savings while supporting your commitment to sustainable living.
The Energy Efficiency Crisis Hiding in Your Laundry Room
How Lint Buildup Steals Your Energy
Understanding how lint affects your dryer’s performance starts with a simple principle: airflow is everything. When hot, moist air can’t escape efficiently through your dryer vent, your appliance works harder and longer to dry each load.
Even a thin layer of lint acts like insulation inside your vent pipe, creating friction that restricts airflow. Think of it like breathing through a straw versus breathing normally. As lint accumulates, this resistance grows exponentially. Your dryer’s heating element continues running, but without proper ventilation, that heat can’t effectively evaporate moisture from your clothes.
The impact on drying times is significant. Research shows that moderate lint buildup can extend drying cycles by 25-50%. A load that should take 45 minutes might require an hour or more, sometimes necessitating a second cycle. Each extra minute translates directly to increased energy consumption, whether you’re using electricity or natural gas.
Here’s what happens during an extended drying cycle: your dryer runs longer, consuming more fuel, while simultaneously generating excess heat that often escapes into your laundry room rather than venting outside. This creates a double penalty—you’re paying for wasted energy while potentially forcing your air conditioner to work harder during warmer months.
The financial impact adds up quickly. If your dryer uses 3,000 watts and runs an extra 20 minutes per day due to lint buildup, that’s approximately 36 extra kilowatt-hours monthly. At average electricity rates, this inefficiency costs $50-75 annually per household—money that simple maintenance could return to your pocket.
The Real Cost on Your Utility Bills
A clogged dryer vent can add $15 to $30 monthly to your energy bills, translating to $180 to $360 in unnecessary costs each year. When lint buildup restricts airflow, your dryer runs 30% longer per cycle, consuming significantly more electricity or gas. For an average household doing eight loads weekly, this means your dryer works overtime for roughly 150 extra hours annually.
Consider the numbers: a clean dryer vent allows your machine to complete a cycle in 40 minutes using about 3 kilowatt-hours of electricity. That same load with a clogged vent might take 60 minutes and consume 4.5 kilowatt-hours. At the national average of $0.16 per kilowatt-hour, you’re spending 24 cents extra per load, which quickly compounds.
Beyond the dryer itself, extended run times generate excess heat that can affect your home’s cooling costs during warmer months. A professional energy audit can pinpoint exactly how much energy waste you’re experiencing. The good news? Regular vent maintenance typically pays for itself within one year through reduced utility expenses alone.
Warning Signs Your Dryer Vent Needs Attention
Performance Red Flags
Your dryer often sends clear signals when the vent needs attention, and recognizing these warning signs can help you address efficiency issues before they impact your energy bills significantly.
If your clothes are taking noticeably longer to dry than they used to, particularly heavy items like towels or jeans requiring multiple cycles, restricted airflow is likely the culprit. This extended runtime directly translates to wasted energy and higher utility costs. You might also notice that clothes feel unusually hot to the touch at the end of a cycle, indicating that heat isn’t properly venting and is instead building up inside the drum.
Pay attention to the exterior of your dryer as well. If the top or sides feel excessively hot during operation, or if the laundry room itself becomes uncomfortably warm, these are strong indicators that your vent system isn’t releasing heat efficiently. This trapped heat forces your dryer to work harder and consume more electricity or gas.
Perhaps the most concerning red flag is a burning smell during operation. This can indicate lint accumulation reaching dangerous levels within the vent or around the heating element. If you notice this, stop using your dryer immediately and schedule a thorough cleaning. Not only does this represent a serious fire hazard, but it also means your dryer is operating at significantly reduced efficiency, costing you money with every load.
Visual Inspection Clues
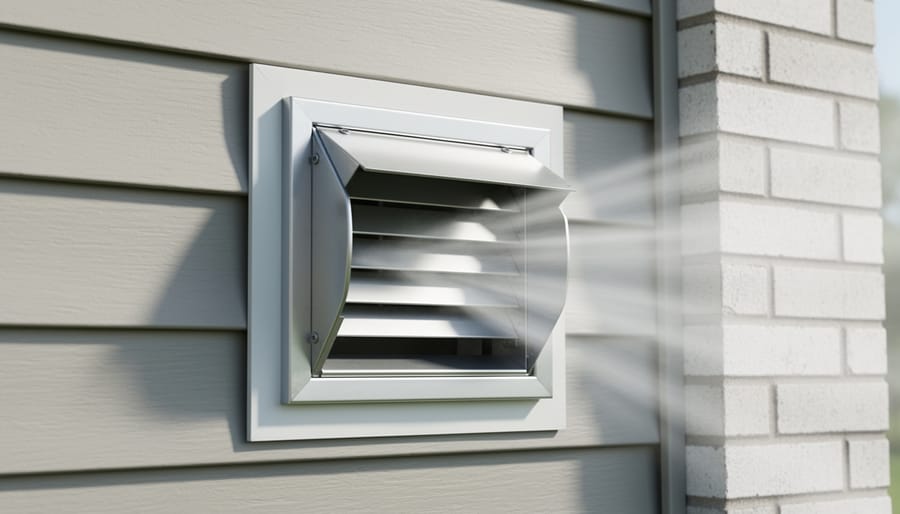
Regular visual inspections take just minutes but can reveal issues that cost you money every time you run your dryer. Start by stepping outside to examine your exterior vent flap. This small hood should open freely when air flows through and close completely when your dryer isn’t running. If it stays partially open or won’t budge, you’re likely losing heated air from your home or blocking airflow that makes your dryer work harder.
Next, trace the ductwork from your dryer to where it exits your home. Look for visible lint buildup around connection points, which signals escaping air and reduced efficiency. Even small gaps can force your dryer to run 25-30% longer to complete a cycle. Check for crushed sections, especially behind the dryer where the duct might have been pushed against the wall during installation or cleaning.
Pay attention to any sections that appear disconnected or loosely fitted. These breaks don’t just waste energy by releasing warm, moist air into your home; they can also create moisture problems in walls or crawl spaces that lead to costly repairs down the road.
If you notice lint accumulating faster than expected or your exterior vent feels unusually warm during operation, these visual clues suggest it’s time for a deeper cleaning to restore your dryer’s energy efficiency.
The Three-Part Maintenance Strategy That Cuts Energy Waste
DIY Cleaning: What You Can Do Today
Taking control of your dryer vent maintenance doesn’t require professional tools or expertise. Here’s what you can accomplish today to boost your dryer’s energy efficiency and reduce fire risk.
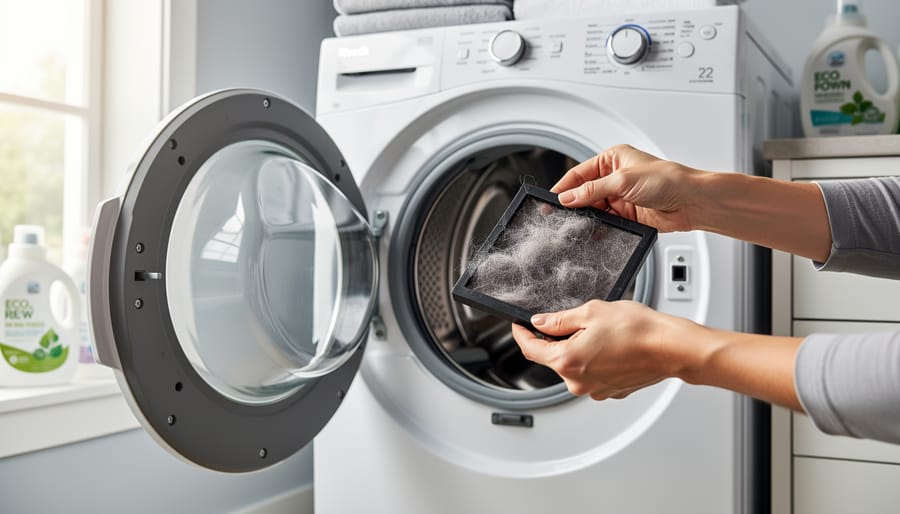
Start with the lint trap, your first line of defense. Remove it after every single load and clear away visible lint by hand or with a soft brush. Once weekly, wash the screen with warm, soapy water to remove fabric softener residue that creates an invisible film blocking airflow. Let it dry completely before reinserting. This simple habit alone can improve drying efficiency by up to 30 percent.
Next, tackle the accessible portions of your vent duct. Unplug your dryer and carefully pull it away from the wall. Disconnect the duct from the dryer’s exhaust outlet. Using a flashlight, inspect the visible duct sections for lint buildup. A flexible dryer vent brush, available at most hardware stores for around ten dollars, lets you manually sweep out accumulated debris. Work the brush back and forth several times, then vacuum up dislodged lint with a shop vac or your home vacuum’s hose attachment.
Move outside to check your exterior vent opening. Remove the cover if possible and clear away any lint, leaves, or debris blocking the opening. Verify the exterior flap moves freely when you run the dryer. A stuck or damaged flap lets cold air infiltrate your home, wasting energy even when the dryer isn’t running.
While DIY cleaning addresses surface-level maintenance, recognize its limitations. You can typically clean only the first few feet of ductwork safely. If your vent runs longer than ten feet, includes multiple turns, or travels through walls or floors, professional deep cleaning every one to two years remains essential. Never attempt to disassemble built-in ductwork or climb onto your roof without proper safety equipment. Know when to call the professionals while maintaining what you can reach safely.
When to Call a Professional Cleaner
While regular DIY maintenance keeps your dryer vent functioning well, certain situations call for professional expertise. Understanding when to bring in the experts can save you money and ensure your system operates at peak efficiency.
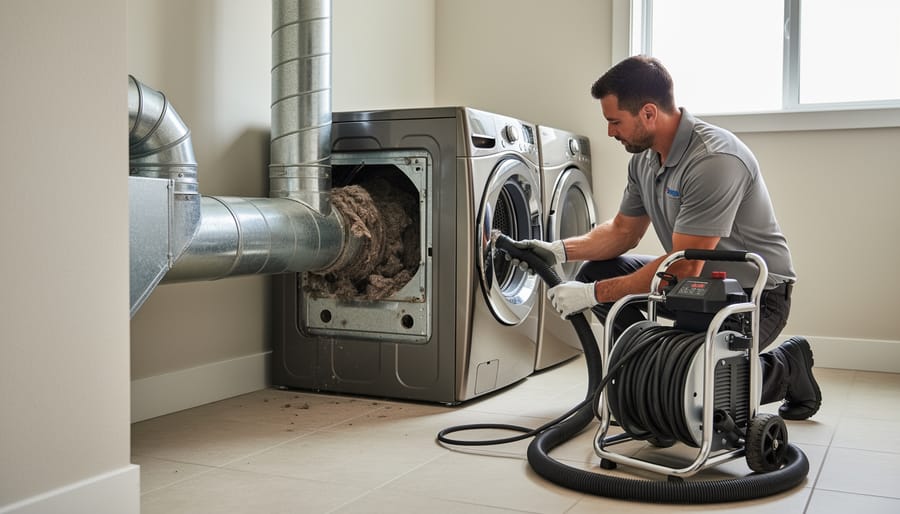
Consider hiring a professional if your dryer vent hasn’t been cleaned in three years or more. Built-up lint and debris can become compacted deep within the ductwork, requiring specialized equipment to remove completely. Similarly, if your vent runs longer than 25 feet or includes multiple turns and elbows, professional-grade tools will reach areas that standard DIY kits cannot access effectively.
Complex vent configurations, such as those running through multiple floors or walls, also benefit from professional attention. These systems often have hidden problem areas where moisture and lint accumulate, reducing airflow and energy efficiency. If you’ve noticed persistent issues like excessive drying times, unusual odors, or overheating despite your cleaning efforts, a professional assessment can identify underlying problems.
Professional dryer vent cleaning typically costs between 100 and 200 dollars, depending on your location and vent complexity. This investment includes inspection with specialized cameras, powerful vacuum systems that extract debris from the entire duct length, and verification that airflow has been restored to optimal levels.
When weighing this cost, consider that a clogged vent can increase your energy bills by 20 to 30 dollars monthly. Professional cleaning pays for itself within several months through energy savings alone, while also extending your dryer’s lifespan and significantly reducing fire risk. Many professionals also provide maintenance recommendations tailored to your specific setup, helping you maintain efficiency between service calls.
Inspection Schedule for Peak Efficiency
Establishing a regular inspection routine helps you catch efficiency problems early and maintain optimal dryer performance year-round. The frequency of inspections should align with how heavily you use your dryer and the specific risk factors in your household.
For average households doing 4-6 loads weekly, inspect your dryer vent every six months. However, if you have a large family, pets that shed, or do more than eight loads per week, quarterly inspections become essential. These high-use scenarios accelerate lint buildup and increase the risk of reduced efficiency. Similarly, homes with long vent runs or multiple bends should inspect more frequently, as these configurations trap debris more readily.
During each inspection, start by examining the exterior vent hood. Check that the flapper opens fully when the dryer runs and closes completely when off. Look for visible lint accumulation around the opening or on nearby surfaces. Inside, disconnect the dryer and inspect the duct connection for gaps, damage, or lint buildup. Feel the ductwork along its length for unusual warmth, which signals restricted airflow.
Pay attention to performance changes between inspections. If clothes take noticeably longer to dry, the laundry room feels warmer than usual, or you detect a musty smell, these warning signs indicate developing blockages that demand immediate attention. Acting on these early indicators prevents the compounding effect of reduced efficiency and higher energy consumption.
Keep a simple maintenance log noting inspection dates and any issues discovered. This tracking helps you identify patterns and adjust your schedule as needed, ensuring your dryer operates at peak efficiency while extending its lifespan and protecting your energy investment.
Common Repairs That Restore Energy Performance
Addressing common dryer vent problems can dramatically improve your appliance’s energy performance while reducing utility bills and environmental impact. Here are the repairs that deliver the most significant efficiency gains.
Replacing crushed or disconnected ductwork ranks among the most impactful repairs. When ducts become compressed behind the dryer or disconnected at joints, heated air escapes into your home rather than venting outside. This forces your dryer to run 30-50% longer to achieve the same results. Reconnecting and repositioning ducts properly can restore optimal airflow immediately, cutting energy consumption by up to one-third.
Fixing improper vent terminations offers substantial benefits too. Many homes have vents that discharge into attics, crawl spaces, or terminate without proper dampers. This creates backdraft issues and moisture problems while wasting energy. Installing correct exterior terminations with bird guards and functioning dampers typically costs $75-$150 and prevents heated air loss year-round.
Upgrading from flexible vinyl or foil ducts to rigid metal ductwork represents one of the best energy efficient upgrades for your laundry system. Vinyl ducts trap lint more easily and restrict airflow with ribbed interiors. Smooth metal ducts maintain 25% better airflow, reducing drying times and energy use proportionally. This upgrade typically pays for itself within 18-24 months through energy savings.
Sealing duct leaks completes the efficiency picture. Even small gaps at connections waste heated air and reduce system performance. Professional-grade metal tape or mastic sealant creates airtight connections that can improve efficiency by 15-20%, ensuring every bit of heat reaches your clothes rather than heating unused spaces.
Maximizing Long-Term Energy Savings
Installation and Design Choices That Matter
If you’re installing a new dryer or renovating your laundry space, making smart design choices now will save you energy and maintenance headaches for years to come. The gold standard is a rigid metal duct rather than flexible foil or plastic alternatives. Rigid metal ducts maintain their shape, resist crushing, and create the smoothest pathway for airflow, which directly translates to faster drying times and lower energy consumption.
Keep your vent run as short and straight as possible. Each 90-degree turn reduces airflow efficiency by approximately 5 feet of equivalent length, so minimizing bends means less resistance and better performance. Ideally, limit your total vent length to 25 feet or less, subtracting footage for each elbow or turn.
Position your dryer on an exterior wall whenever layout permits. This simple placement choice can dramatically reduce vent length and eliminate unnecessary turns. For the exterior termination, choose a louvered vent cover with a damper that opens during operation and closes when idle to prevent backdrafts and pest entry.
Avoid running vents through unconditioned spaces like attics without proper insulation, as temperature differences can cause moisture condensation that promotes lint buildup. These thoughtful installation decisions create a system that naturally resists clogging, maintains optimal airflow, and delivers consistent energy savings throughout its lifespan.
Creating Your Maintenance Calendar
A well-organized maintenance calendar transforms dryer vent care from an overwhelming task into a manageable routine. Start with quarterly inspections—every three months, check the exterior vent flap to ensure it opens freely and remove any visible lint buildup around the opening. This quick five-minute check catches problems early and becomes second nature when tied to seasonal changes.
Twice yearly, typically in spring and fall, perform a more thorough cleaning of accessible vent sections. Disconnect the dryer, vacuum the duct connection point, and use a flexible brush to clean the first few feet of ductwork. These biannual sessions prevent major blockages and align perfectly with other seasonal home maintenance tasks.
Schedule your annual professional inspection or deep cleaning during a slower season when rates may be more competitive. This yearly investment ensures hidden sections of ductwork stay clear and efficient. Mark these dates in your phone calendar with reminders two weeks ahead, giving you time to prepare or book services.
Making dryer vent maintenance part of your energy-saving lifestyle means you’ll never face emergency cleanings or efficiency losses. The combined effort totals just a few hours annually while delivering year-round energy savings and peace of mind.
The Environmental Impact Beyond Your Bills
When you maintain your dryer vent, you’re doing more than just keeping your appliance running smoothly—you’re making a meaningful contribution to environmental sustainability. A clogged dryer vent forces your appliance to consume significantly more electricity, which translates directly into increased carbon emissions from power plants.
To put this in perspective, when your dryer runs 50% longer due to a blocked vent, the average household adds approximately 450 pounds of carbon dioxide to the atmosphere annually. That’s equivalent to driving your car about 500 miles. Multiply this across millions of homes with neglected dryer vents, and the environmental impact becomes substantial.
Beyond carbon emissions, regular vent maintenance reduces strain on the electrical grid. During peak usage times, especially summer months when air conditioning demand is high, every bit of energy conservation matters. Your efficiently running dryer helps prevent brownouts and reduces the need for utility companies to activate less efficient backup power plants.
The environmental benefits extend to water conservation as well. Many people rewash loads that didn’t dry properly the first time, wasting both water and the energy required to heat it. Clean vents ensure clothes dry thoroughly in one cycle, eliminating this unnecessary resource consumption.
By committing to annual dryer vent cleaning, you’re actively participating in the solution to climate change. This simple maintenance task helps you save money and energy while reducing your household’s environmental footprint. Consider tracking your energy usage before and after vent cleaning to visualize your impact. Many homeowners find this tangible evidence motivating, inspiring them to adopt additional sustainable practices throughout their homes. Small actions compound into significant environmental benefits when embraced consistently.
Taking care of your dryer vent stands out as one of the most straightforward yet impactful green home improvements you can make. The financial returns speak for themselves: reduced energy bills, fewer repair costs, and extended appliance lifespan. Meanwhile, the environmental benefits compound over time as you consistently use less electricity and reduce your carbon footprint with every load of laundry.
Now is the perfect time to take action. Start by inspecting your dryer vent system this weekend. Look for visible lint buildup, check the outdoor vent flap, and monitor your next few drying cycles for warning signs like excessive heat or longer drying times. These simple observations will tell you whether you need immediate attention or routine maintenance.
Remember that maintaining your dryer vent isn’t a one-time task but an ongoing commitment that pays dividends year after year. By scheduling regular cleanings, staying alert to performance changes, and following the preventive strategies outlined in this guide, you’re investing in both your household budget and our planet’s future.
The journey to a more energy-efficient home begins with small, manageable steps. Your dryer vent maintenance might seem modest, but it represents a meaningful choice to live more sustainably. Every bit of energy you save contributes to a larger movement toward responsible home ownership and environmental stewardship.